I feel fortunate, overwhelmed, excited, and anxious about starting a makerspace from four white walls. I converted an old textbook room into a makerspace at my last school and for some reason that seemed less daunting of a task.
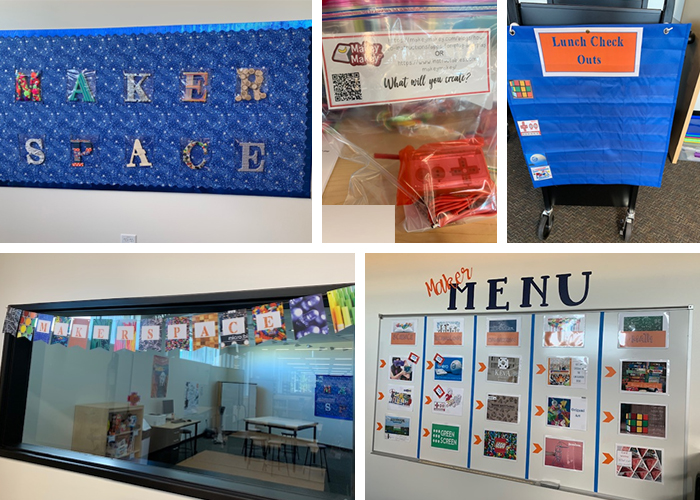
My new library design is absolutely amazing and I feel the pressure of keeping that same vibe in the makerspace. I have a teacher’s desk, a white cabinet, a bulletin board, two tables, a whiteboard, and an active board in the makerspace—I know I am lucky! I would like to get two more tables and at least 12 more stools in the space to allow for at least 30 kids to learn, design, and create in the makerspace. I have found that the library is a very popular place with over 100 students during each lunch; that is going to require extreme organization of space so students can navigate it with little guidance. In the past, I created five engagements that focused on STEAM and featured new materials each month. With this new space, I want to create a Maker Menu that allows students to explore science, technology, engineering, art, and math in many different ways. I have decided to create zones in the space in which students can utilize all the resources we have. I used the whiteboard to create the Maker Menu. Each of the options are magnetic so they can be changed easily depending on material amounts, student interest, and/or class visits. I am also in the process of creating a “no tech” zone of the makerspace where students can practice logic, dexterity, strategy, problem solving, and creative thinking through games. I was very surprised by how many students have been utilizing the games.
Another zone I am working on is a space where students can create different products. This spot is a little trickier because it utilizes the most materials and is the place with the most “tools.” I have so many students at lunch it is hard to monitor each one with the task they are working on. I have taken a book card and utilized it as a quick check out for the materials that I would not want to go missing (Sphero, Rubik’s Cube, Makey Makey kits, Circuit Builder). It is super simple: students give me their ID and I put it in the slot of the resource they want. It is an easy way to keep track of the “flight risk” objects. I used to catalog the items and check them out, however, things like a Rubik’s Cube can’t be stickered. That process also created more congestion at the circulation desk. I have found that simpler is better!
I put an enormous amount of pressure on myself to make the space perfect on the first day, but what I am learning is that as new items arrive and changes are made in the space, kids pay attention to changes and want to try new resources.