Why captions?
They are especially important with so many of us reaching our learning community remotely. As we gear up for a September filled with unknowns, it might be a good idea to develop some agile strategies for addressing and enhancing our flipped or hybrid options.
Captions make a video more accessible for everyone. They help viewers focus. They reinforce meaning. They enhance comprehension especially if the video is not in the viewer’s first language. They facilitate translation. They allow all of us to more easily navigate video formats. They allow us to review.
It used to be that creating transcripts or captions for instructional videos and lectures was an arduous or expensive task. It’s gotten way easier.
Here are three free and easy options.
1. Google Slides
If you are working in Google Slides and using your microphone to record, Slides transcribes in realtime. Simply go to View and select Present. Click on the cc option on the bottom menu bar and captions will automatically appear as you speak and move from slide to slide. You can position the captions and adjust text size. You can use Zoom or any screencasting program to record your presentation.
2. YouTube
YouTube allows creators to automatically include closed captioning in their videos. This YouTube Help page offers advice on several ways to include transcripts or captions.
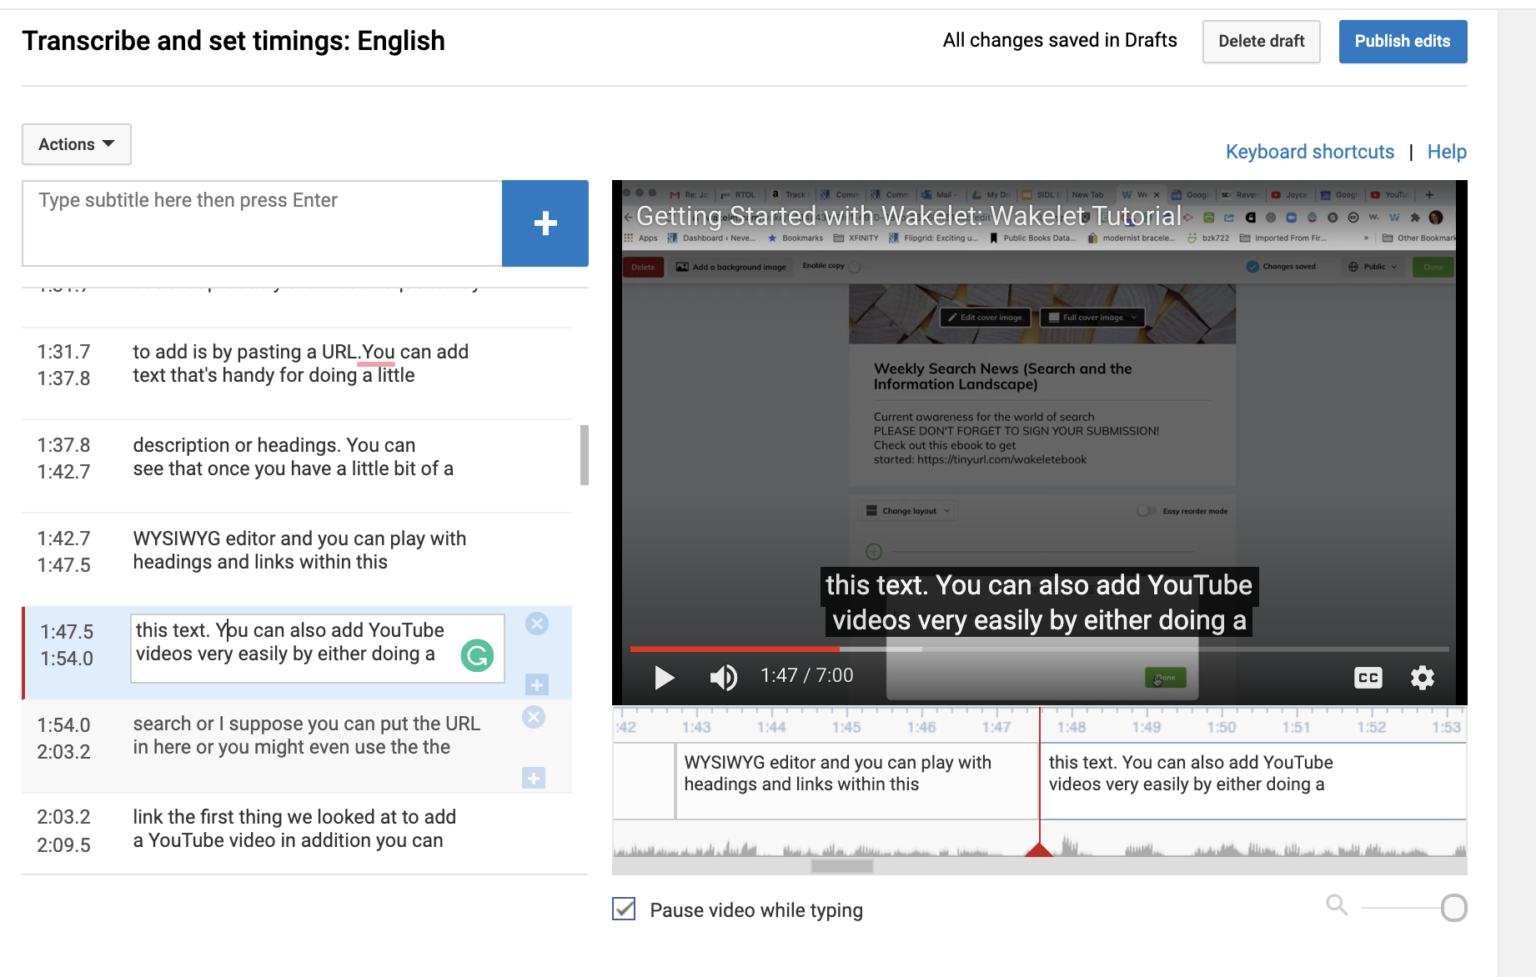
I prefer to use and edit automatic captions generated by YouTube’s speech recognition technology. If they are available, they will be automatically published, but be patient. There is a bit of lag time. (If captions do not generate automatically, it may be due to the length of the video, poor sound quality, silence at the beginning of the project, or overlapping speakers.)
You will absolutely want to tweak the captions. My little Wakelet tutorial was absolutely not ready for prime time, especially in the multiple and very curious and embarrassing ways the name Wakelet was originally captured by speech recognition.
To edit your captions:
- Sign in to YouTube Studio.
- Select Subtitles from the left menu
- Select the video you’d like to edit.
- For the language you’d like to edit, in the “Subtitles” column, select Options
Edit.
- Click Edit on the top right.
- Click on the caption track you want to edit.
- You can run the video and click anywhere in the caption track panel to edit text.
- When you’ve finished click Publish edits, at the top right.
- You’ll be asked to confirm that you want to overwrite existing subtitles. Click Publish.
 I discovered that a good number of my students don’t realize that captions and transcripts are available for many of the videos they view.
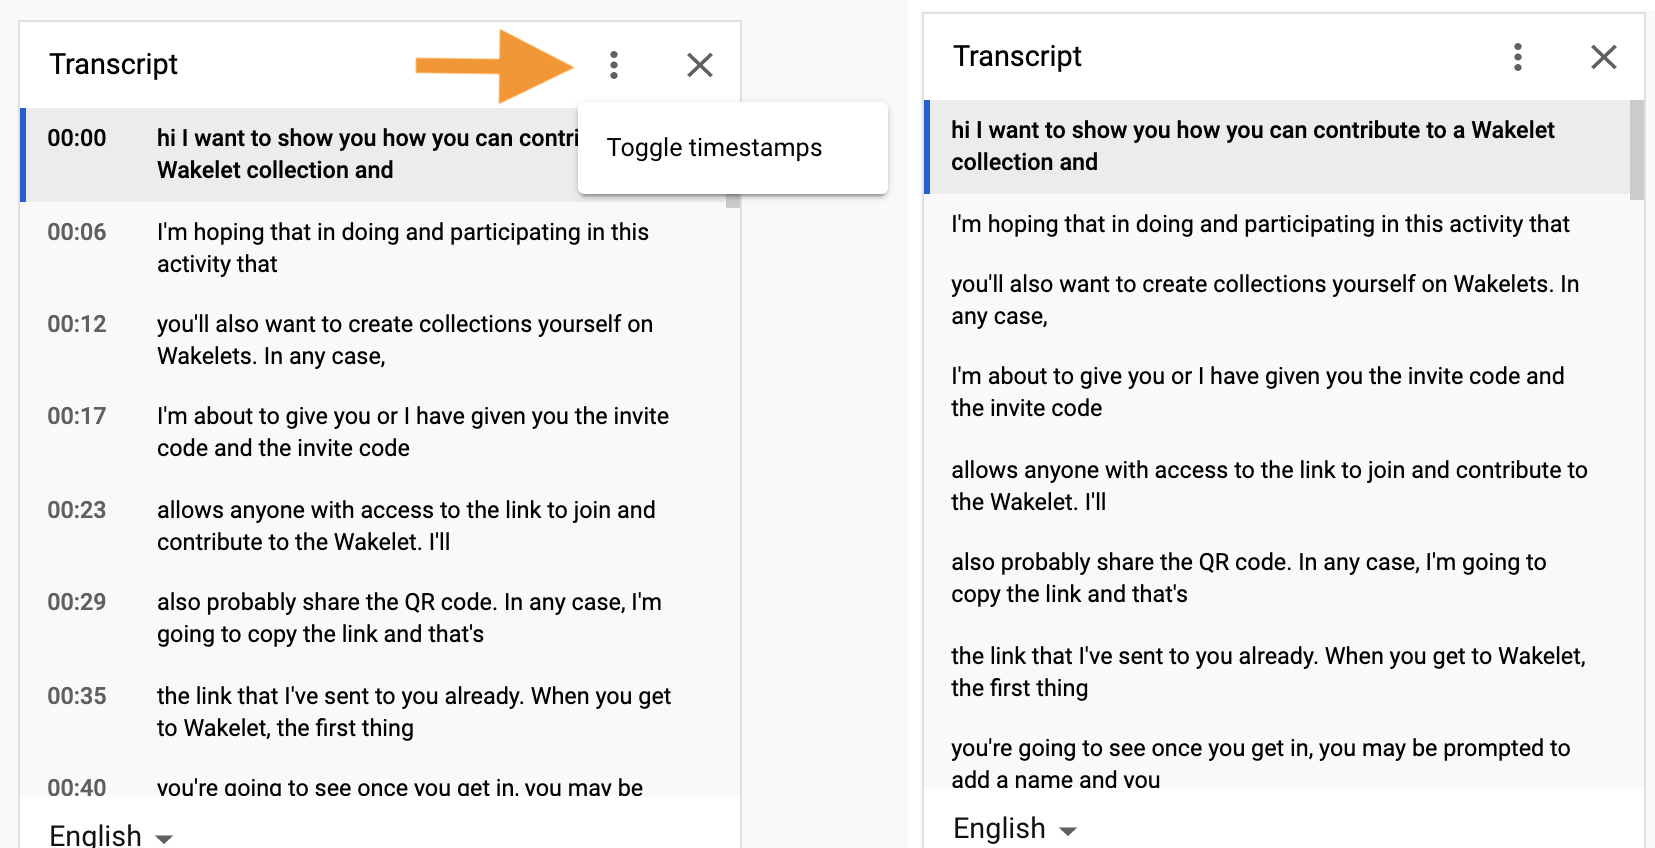
It’s helpful to show them how easy it is to make them appear. Note that timestamps may be toggled off for students who’d like to save a text version of the narration or dialog.
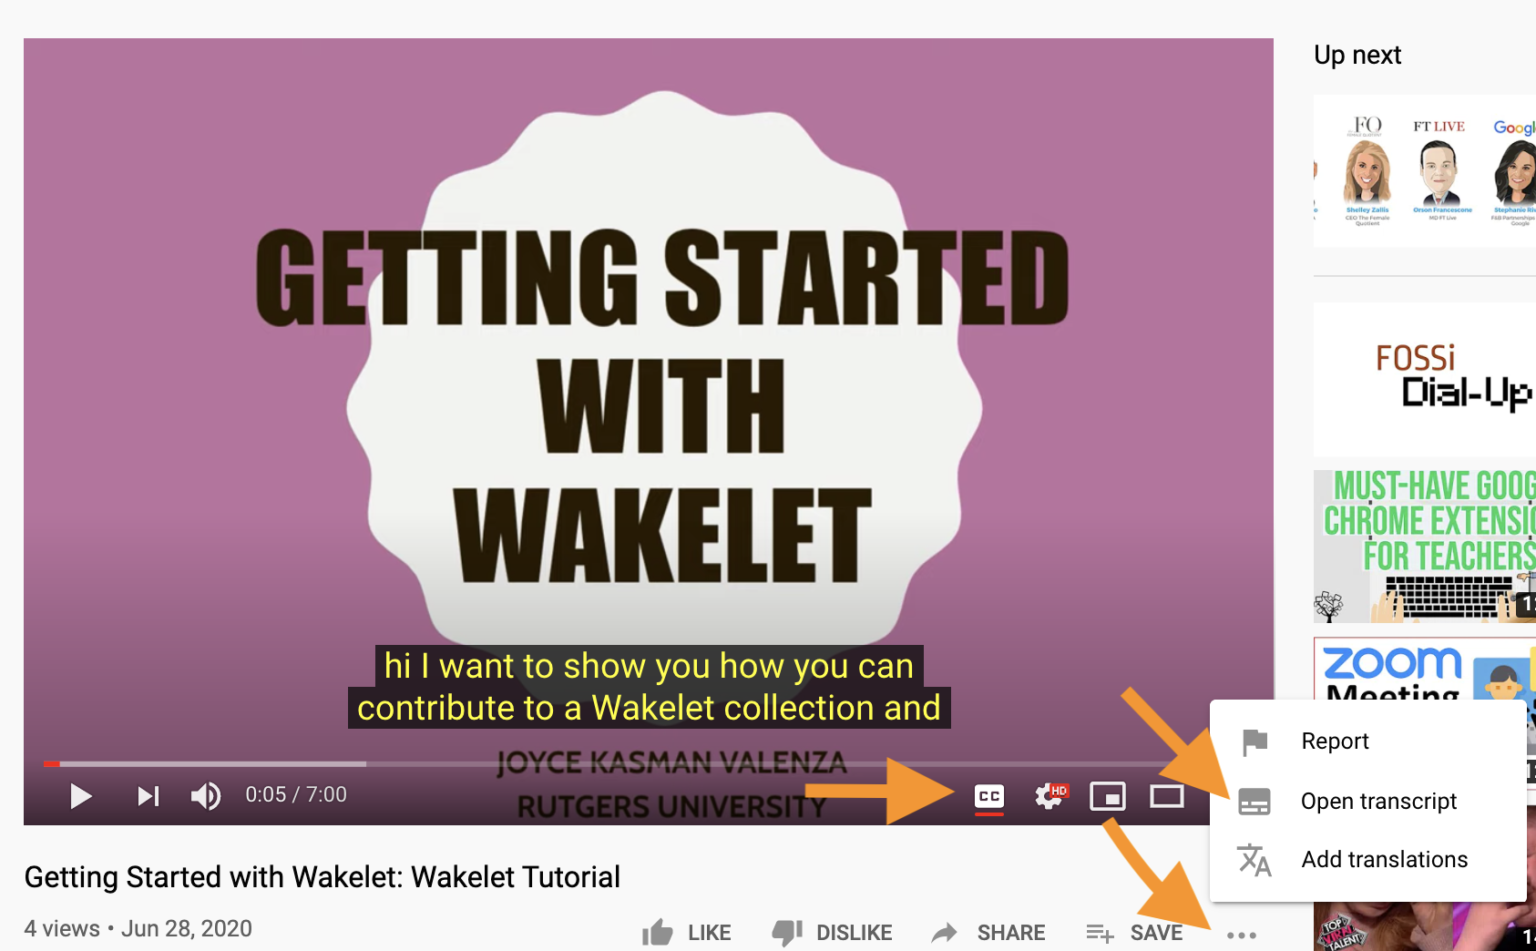
Finding Closed Captions and transcripts
 3. Flipgrid
Enabling and Editing Flipgrid Captions

Enabling and Editing Flipgrid Captions
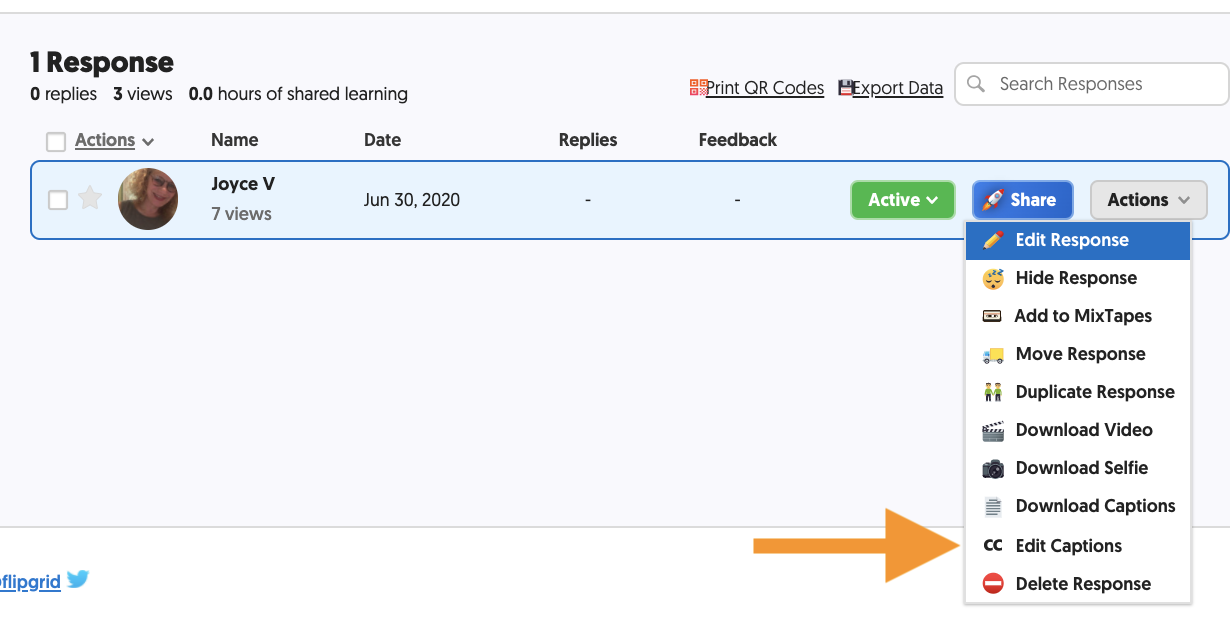
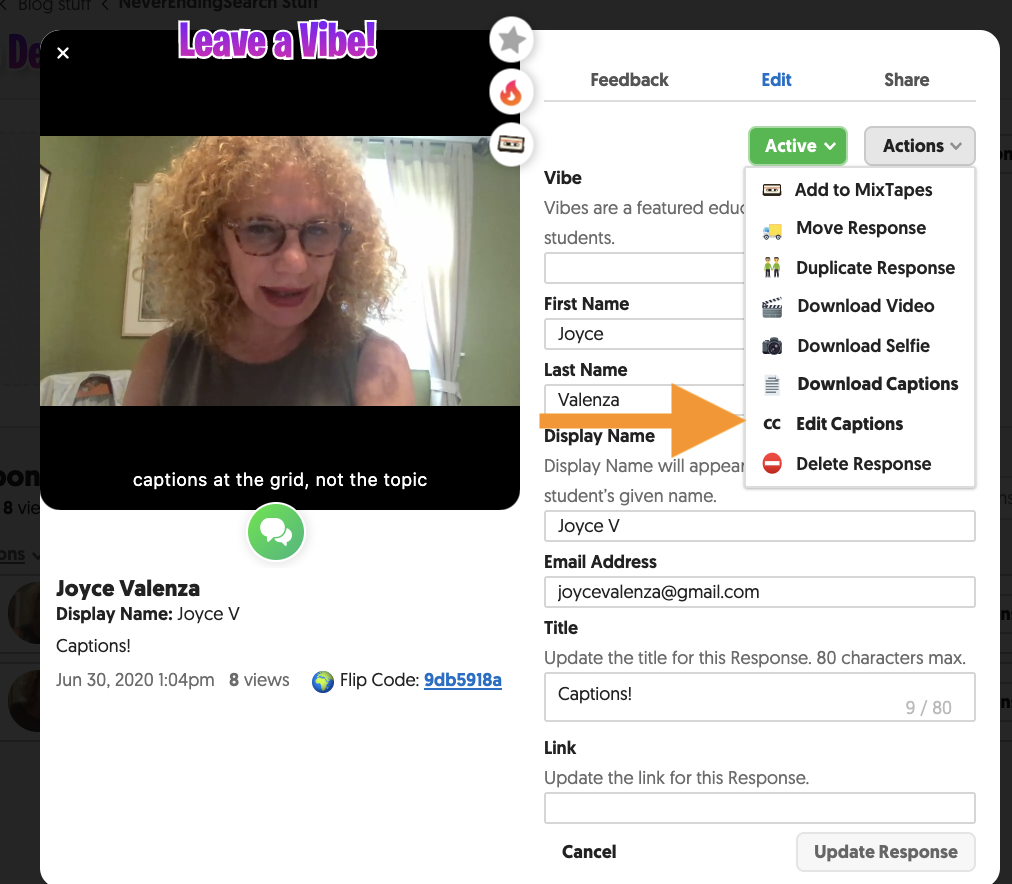
Flipgrid automatically generates closed captions using Microsoft’s Azure services. Using your educator login, enable captions at the Grid, not the Topic level. Captions may be created in multiple languages and they may be edited.
To Edit Captions in Flipgrid using your login:
- Select the Grid
- Scroll down to the Topic where the video lives
- Use the Actions button and select Edit Captions on the video you’d like to edit the captions.
Editing captions in Flipgrid
4. Otter_ai
A colleague recently introduced me to the magical application, Otter_ai. Otter’s basic, free account offers a generous 600 minutes that renews each month. I am impressed with the accuracy of this text-to-speech application that easily allows you to record and transcribe online meetings and conversations. Available form desktop, Android, and iOS devices, it can optionally connect to your calendar.
Happy captioning friends. And remember–speak clearly and eliminate background noise!