I have been exploring the world of digital badges for quite some time now. It’s a great way to give students a sense of accomplishment and promote their learning. The most difficult for me was finding a way to share the badges with my students. The class I teach Information Literacy, which is really changing to Design Technology (the name will be changed formally by next year) is comprised of many technology projects. Each project is sent to my students through Google Classroom. Yes, we have gone completely paperless, and it’s a beautiful thing 🙂 Students receive directions to the project, any links and documents, and a copy of the rubric. My idea is to add the digital badge they receive directly to the rubric. They will be able to save this badge and add it directly to their Google Sites, which serves as a Digital Portfolio. If you are interested in creating a Digital Portfolio for your students through Google Sites, please see my most recent blog post.
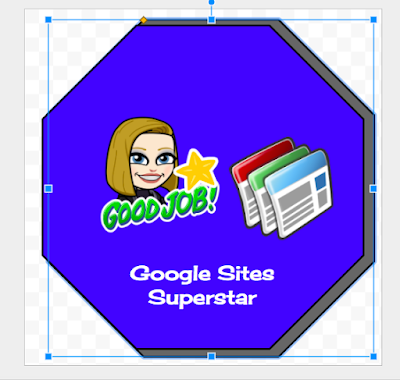
Here is What I came up with when I created a digital badge for completing their Google Site. The most common question I get when I show this badge to people is how did you create this. Well, it really is quite simple. The steps below will describe the process I took using Google Drawings.
![]()
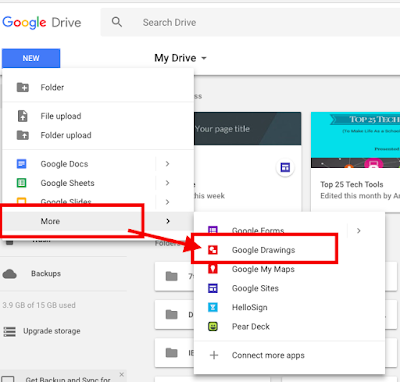
1. Go to your Google Drive, Choose More and open up a new Google Drawings
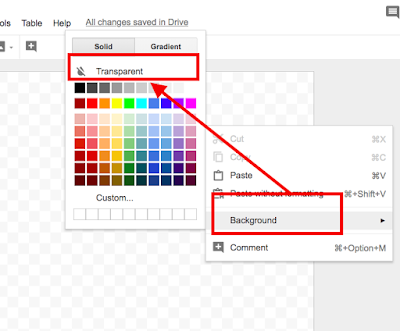
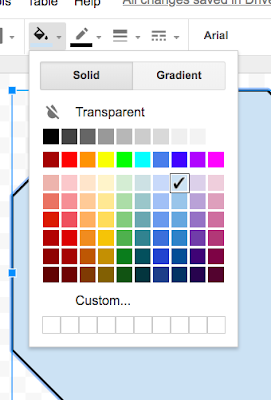
2. The first thing you want to do is make your background transparent. This will allow the badge to show the graphics and you won’t get a white background.
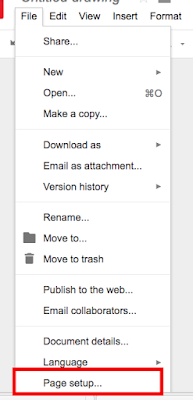
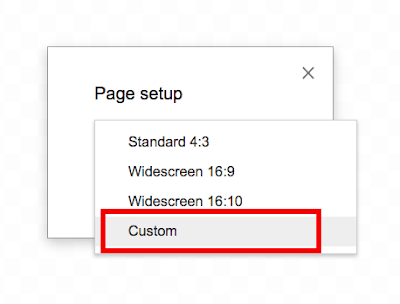
3. Next, you will want to change the size. We are making badges so you will want them to be relatively small. Go to File and choose Page Setup.
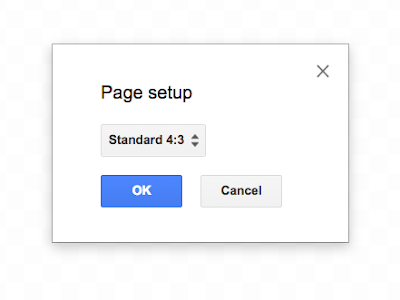
Choose Custom
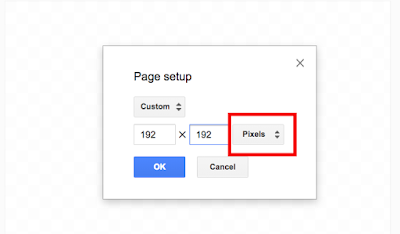
Next, change from inches to Pixels and type in 192 X 192 and Click OK
You will notice that your working area is now much smaller.

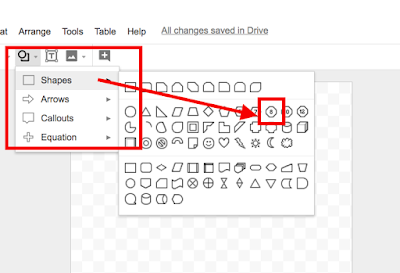
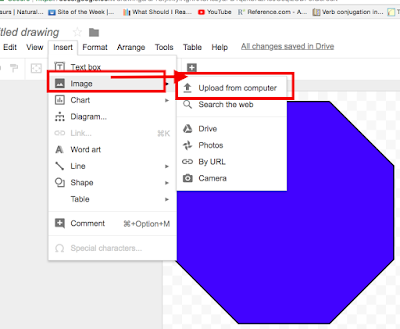
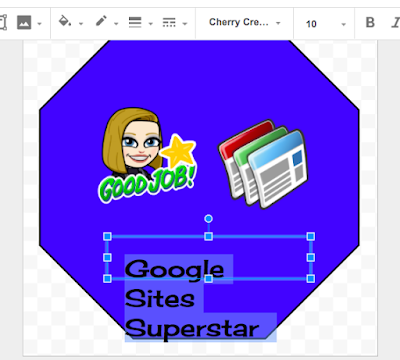
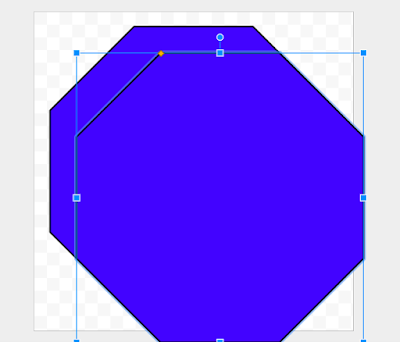
4. Now it’s time to start designing your badge. Go to Shapes and choose a shape you would like to use. I like to use the Octagon shape, but you can choose a shape you like best.
Draw Your Shape and then click on it, so you can fill in your shape with a color. I like to take up the full space, and leave only about one squares length of space on either side.
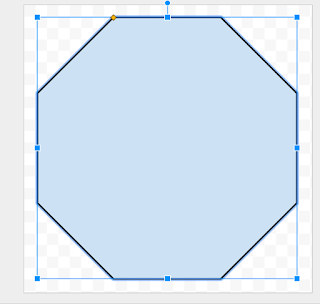
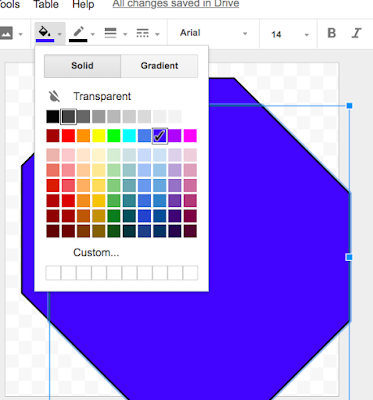
Once your shape is selected go up the paint bucket and choose a color.
5. Now it’s time to start adding in a graphic or graphics that would like to add. Go to upload and add the pictures/graphics you want to add to your badge.
Make sure you have selected your image, so you can resize the graphic to fit inside your badge. I like to add an image from my bitmoji, which is available as a Chrome Extension. This is done by right clicking on the image and choosing copy. Then right clicking once I get to my working area and clicking on paste.


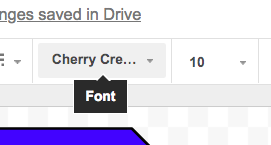
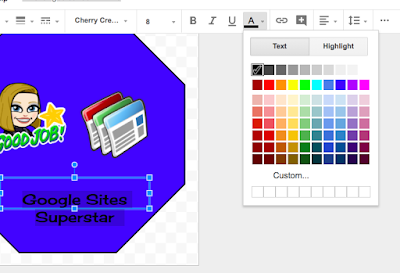
6. The next step is adding the Text for your Badge. Click on The T at the top of your menu and draw a text box in your badge. I like to keep my font in between size 10 and 12, and choose an interesting font.
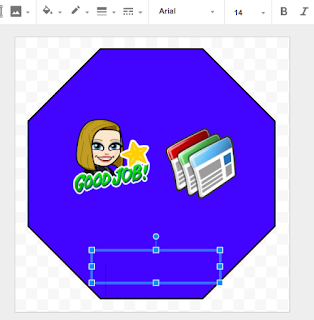
Next, type in your text. If I am using a dark background, I like to use a light font.
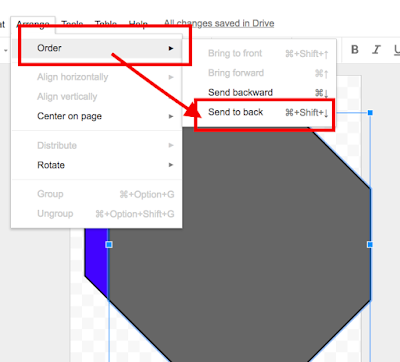
7. If you want to add a shadow effect, this can be accomplished by clicking on your badge and selecting the shape. Next you right click and choose copy, and right click again to choose Paste.
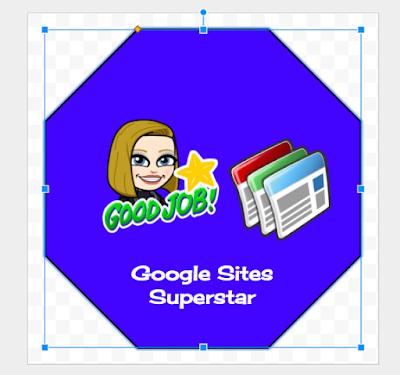
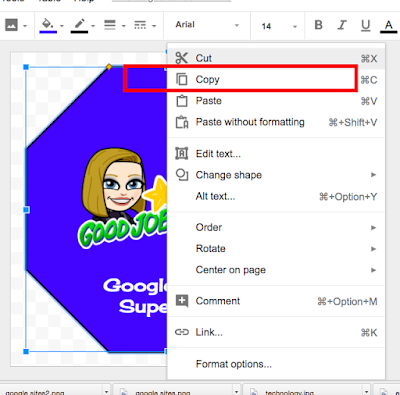
Click on the paint bucket, and choose a darker color, for a shadowed effect. Next, click on arrange on the menu and choose send to back. You may need to resize a bit to get the full shadow effect.
8. Name your Badge.
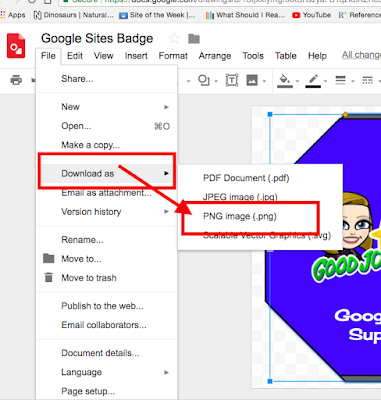
Go to file and choose Download. Download as a PNG Image. Your file will now be available for you whenever needed.
I hope this tutorial was helpful in learning how to create your own digital badges. I would love to see badges that you are creating. Please share with me 🙂